Coloration
I am away on a road trip and will be back in a week or so.
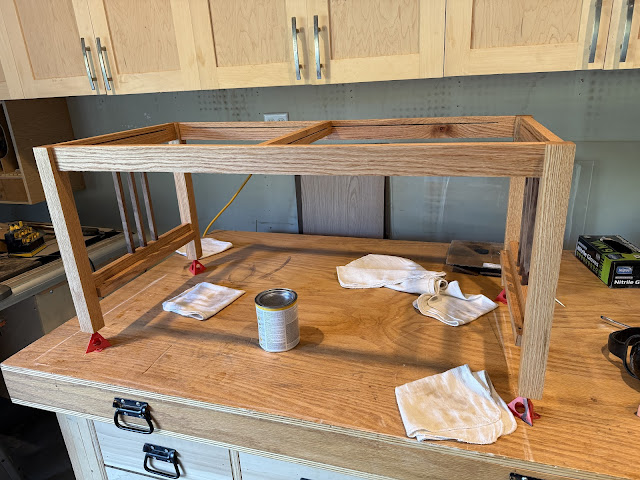
I love the part of a wood build project when I start the finishing process. For many years, at least up until the recent altar I built for someone else, I have eschewed the use of stains and instead prefer to retain the natural colors of wood. Thus I have forgone the use of stains and film finishes and instead just apply oil to my wood projects. In this case, I am using a hard wax oil finish which penetrates into the wood to provide protection from moisture and allows the richness of the wood to be visible.
Above is the lower shelf of the coffee table which I made out of read oak boards planed down to an inch thick.
Next up, I applied the same finish to the base minus the three vertical walnut pieces on each end. Since I still have a decorate element to make (and haven't yet started on it) that will adhere to those three pieces, I don't want to apply oil to them just yet so that the glue will stick well. When I get those pieces made and attached, I can apply finish to those areas. Unlike film finishes, oils allow you to seamlessly touchup areas without leaving visible lines due to the wood absorbing what it can absorb and no more. It allows me to do partial initial finishes like in this case and to do future spot repairs should they be needed in the future.
Finally I was able to apply some of the hard wax oil to the top which is what I was most looking forward too since it is the most visible surface of a coffee table. It took a lot of sanding and a few epoxy repairs of some pits to turn the rough walnut boards I sources for the top into the top you see above. I am supper happy with the color and know it will look quite nice when everything is assembled together.


The colour looks great Ed!
ReplyDeleteWe use lemon oil to maintain our bokuto (wooden training swords).
I would imagine waxing the handle of a sword would be inviting danger!
DeleteLooks like it will be a beauty!
ReplyDeleteI am pleased with how it turned out. Stay tuned.
DeleteGorgeous!
ReplyDeleteThank you!
DeleteI love seeing how the grain comes to life with finishing. It's beautiful!
ReplyDeleteIt is usually my favorite part of a project followed by the worst when I find some formerly unseen defect that I missed! Fortunately those defects are easier to deal with using this finish than a film finish.
DeleteThat's a gorgeous rich color!
ReplyDeleteIt is hard to beat walnut though I think too much can be overwhelming which is why I like the contrast when paired with oak.
DeleteBeautiful. Love the hard wax finish!!
ReplyDeleteI am finding it hard to beat hard wax oils. They aren't as glossy as film finishes but that it fine with me.
Delete