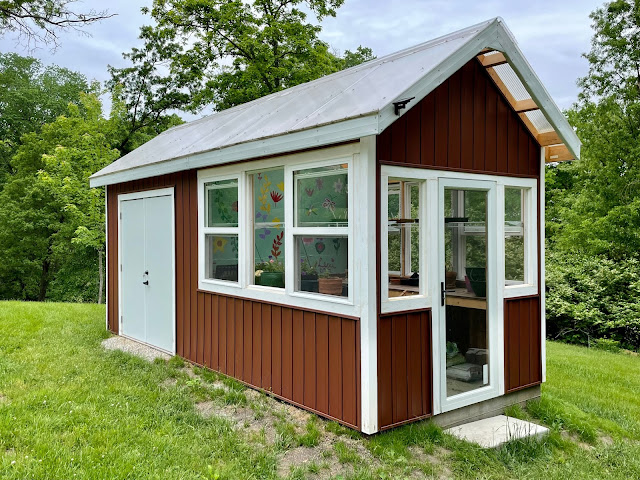
He/She Shed
Last summer,
At first I looked for the easy route of purchasing a kit but I never could find one that fit our needs and so I decided to just design and build it myself. Early last fall I built concrete forms and was able to finagle my concrete guy to work me in between projects. With beautiful weather late into the year, I was able to get everything dried in before the snow flew but I wasn't able to get the siding up. I had planned for that and so bought more expensive sheathing which was essentially plywood with a waterproof coating on it that was supposed to be good for up to six months of inclimate weather.
My wife was in charge of deciding on the siding with my only request being that it was not attractive to woodpeckers which inhabit our area and are fond of poking holes in it as frequently as possible. She went with a barn board looking vinyl siding. I hadn't designed around installing siding vertically and thus having the proper amount of backing for nailing so I had to do some research. In the end, I decided to just screw it on using short screws so that the plywood itself would hold it but application was going to be tricky since I couldn't seat the screws tight. When installing vinyl, one leaves the nail heads slightly gapped from tight to allow the vinyl room to expand and contract as the temperature changes. So too I did this with screws, which meant I didn't get it installed as fast as I might have.
But with a nice stretch of weather one week this spring, I was able to get it up and I think it looks pretty good for vinyl. The only complaint I have is that I had to order it by the box and because it only took a box and a half to do the entire structure, I have a half box leftover that is now up in my attic. Perhaps I or someone I know will have a small project and I can get rid of the extra in an environmentally friendly manner sometime in the future.
So Phase One of the he/she shed project is now complete. Phase Two includes adding a gutter and rain collection system with possibly a foot pump and sink for the inside to aid in watering plants and washing pots and tools. Phase Three might be to install a bed in the lawnmower storage half for when I'm kicked out of the house but I hope we never get to that phase.

That turned out great!
ReplyDeleteI thought so for completely done myself. I might have expected a bit more had I hired it out.
DeleteYa dub gud, Ed.
ReplyDeleteThanks AC
DeleteI really like how it looks now!! Good job! (and you've turned it into a tongue-twister) -Kelly
ReplyDeletePeople kept asking if it was for me or if it was a "she shed" which is how I came to refer to it as a he/she shed.
DeleteIt's beautiful! Knowing your workmanship, I would happily live in your "small house." I didn't realize that about vinyl siding and the expanding/contracting although of course, it makes perfect sense. Lucky that I don't built anything!
ReplyDeleteThat is why on a long run along a side of the house, it is very easy to spot vinyl siding from a long way away. It always warps and buckles on a hot summer day. I'm hoping on very short runs such as this shed, it won't be noticeable until you are up close and notice the details.
DeleteIf you were here I would ask for a treehouse in our mango tree. Nice job!
ReplyDeleteI always wanted one as a child. Thus far, this isn’t on my kid’s radar.
DeleteYou have every right to feel proud of the shed. So much better that you designed and built it yourself than purchasing a ready-made kit. Now don't delay - get the guttering up and buy a camp bed for the lawnmower section.
ReplyDeleteI think if I have to go with a bed, I’ll add a loft and change the roof!
DeleteOh wooooow!!! That is just awesome! I am so so impressed.
ReplyDeleteIt looks great!
ReplyDelete